FAQ

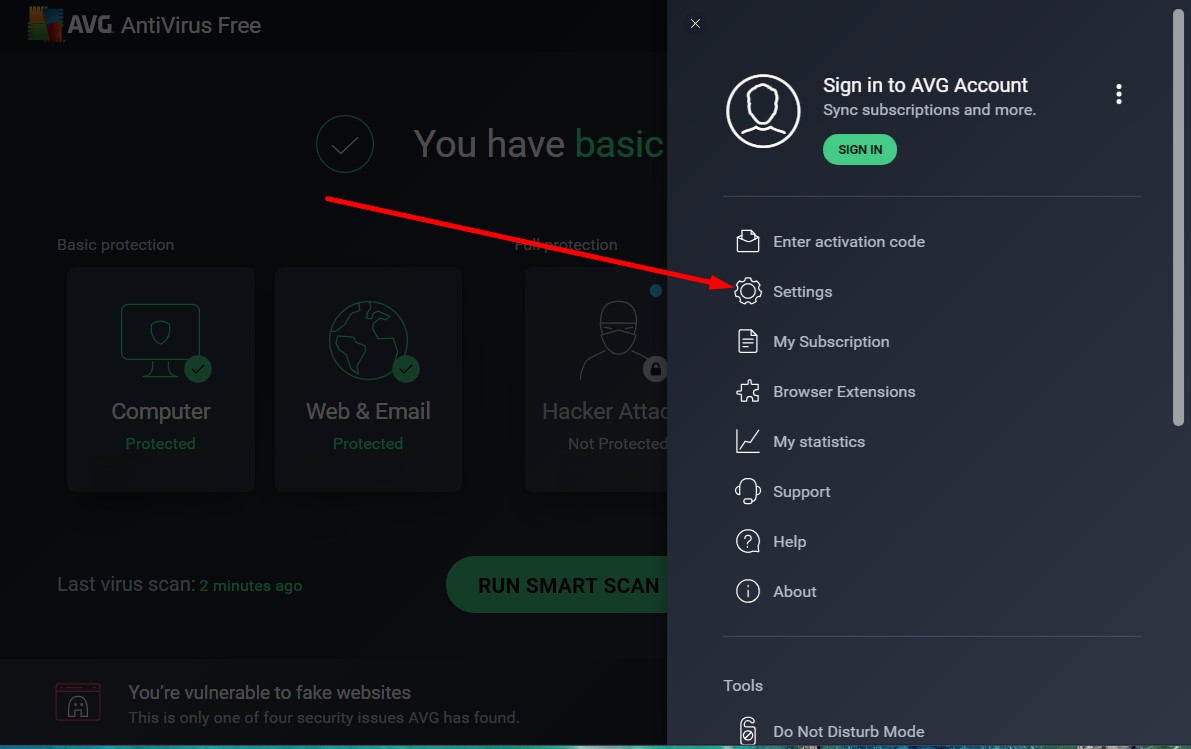
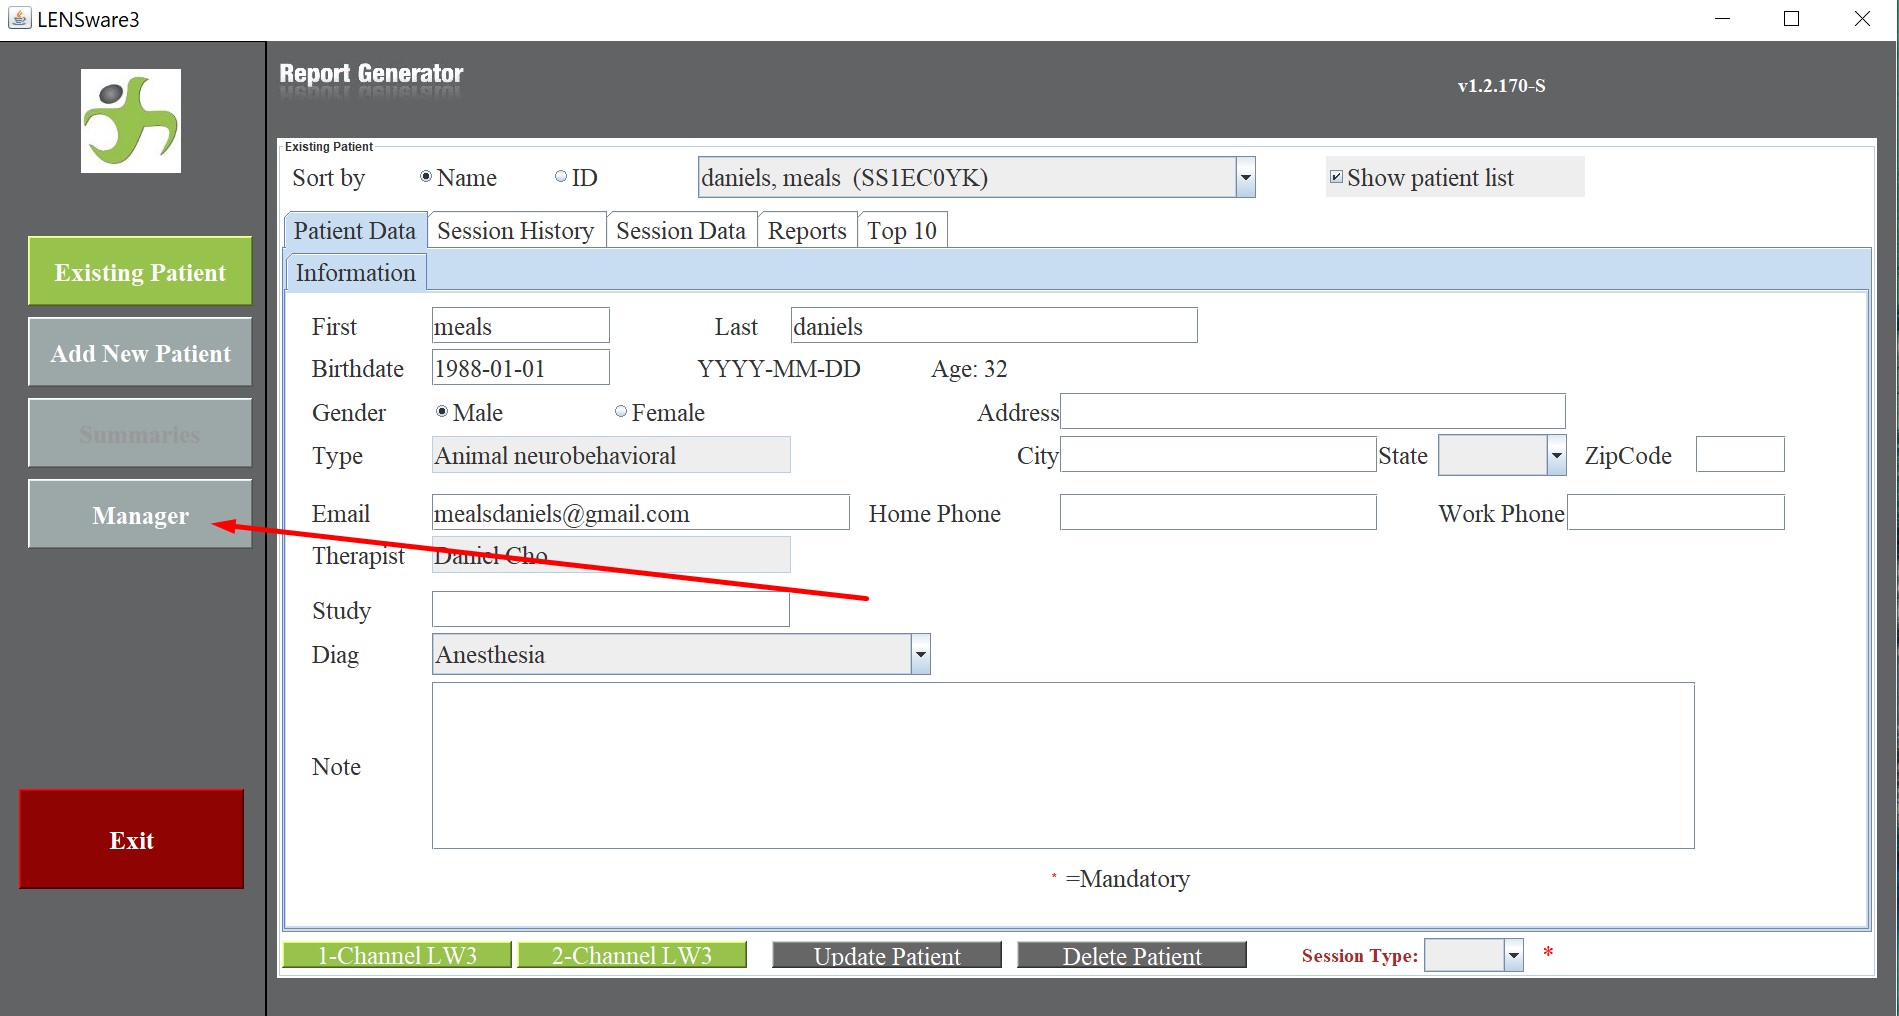
Open your LENSWare3 software, and click the “Manager” tab located on the left hand side:

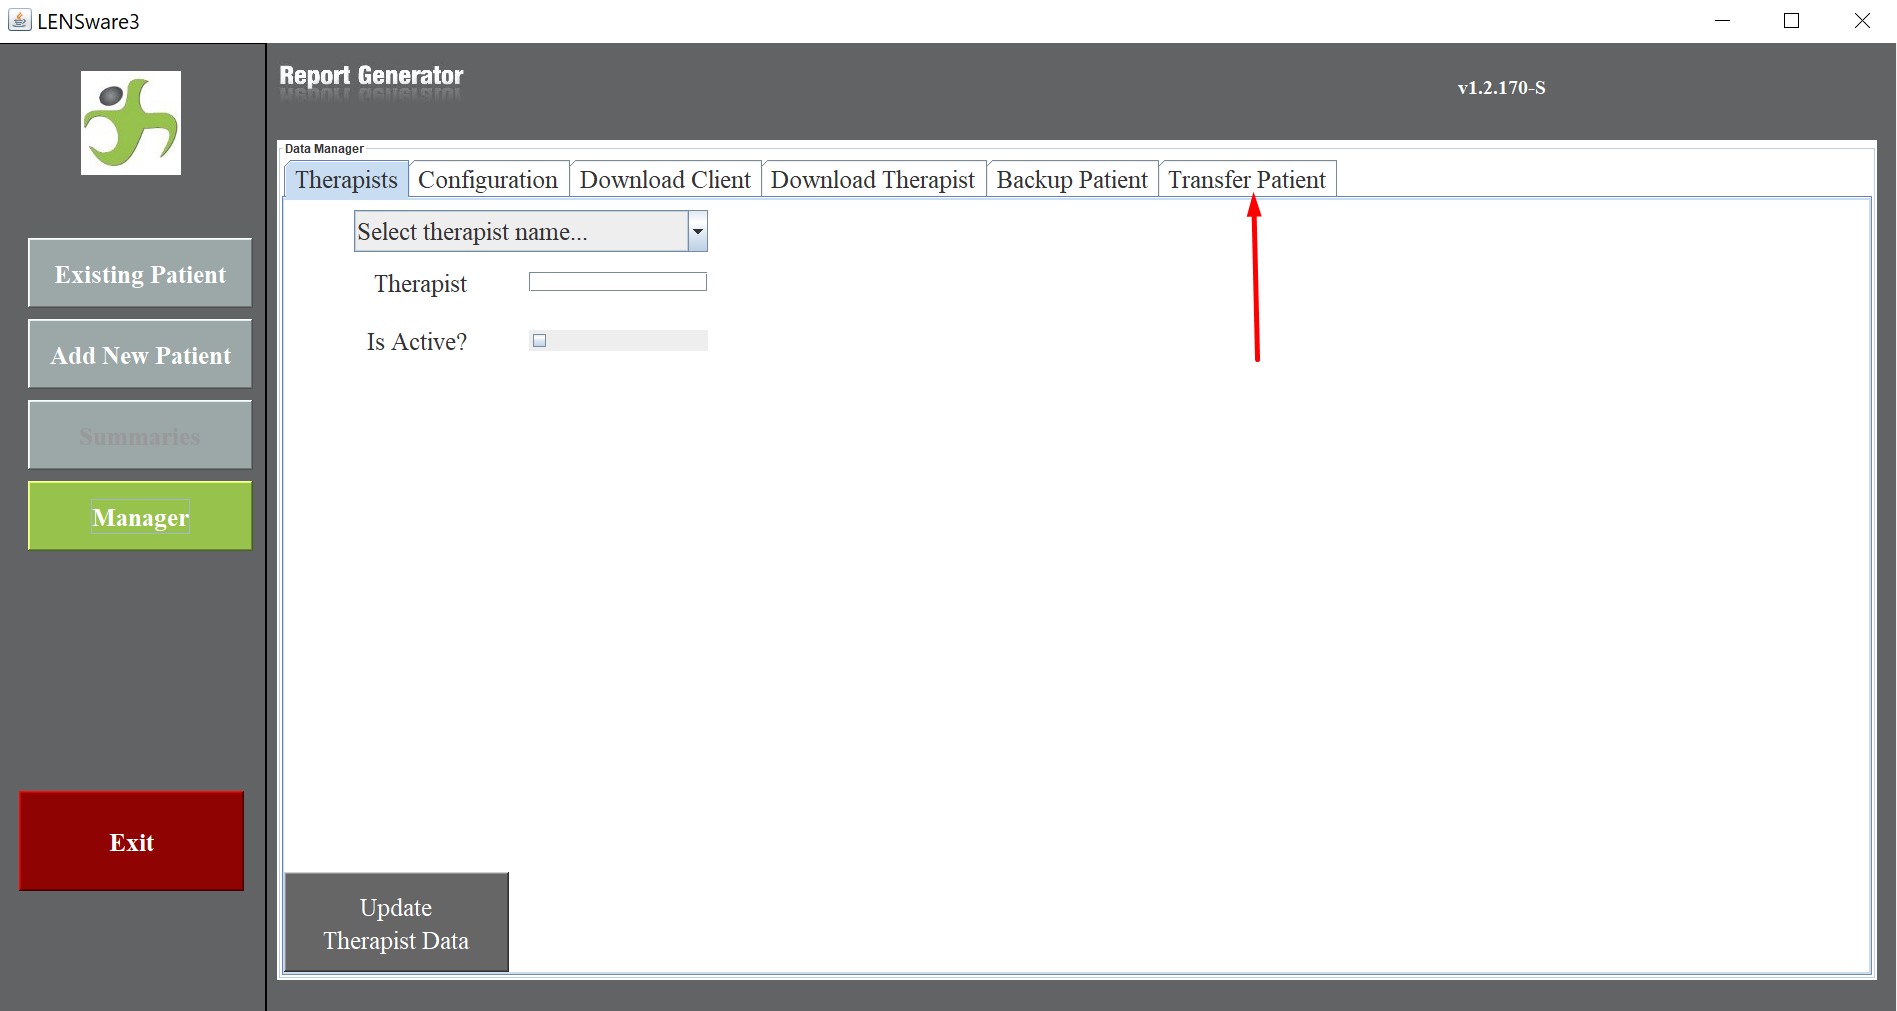
Click the “Transfer Patient” tab once inside the manager options screen, then click the “Select Patients” option located in the middle of the screen, and choose your patient profile you would like to back up. If you would like to back up all your files simply press CTRL+A and all of your patient profiles will be selected:

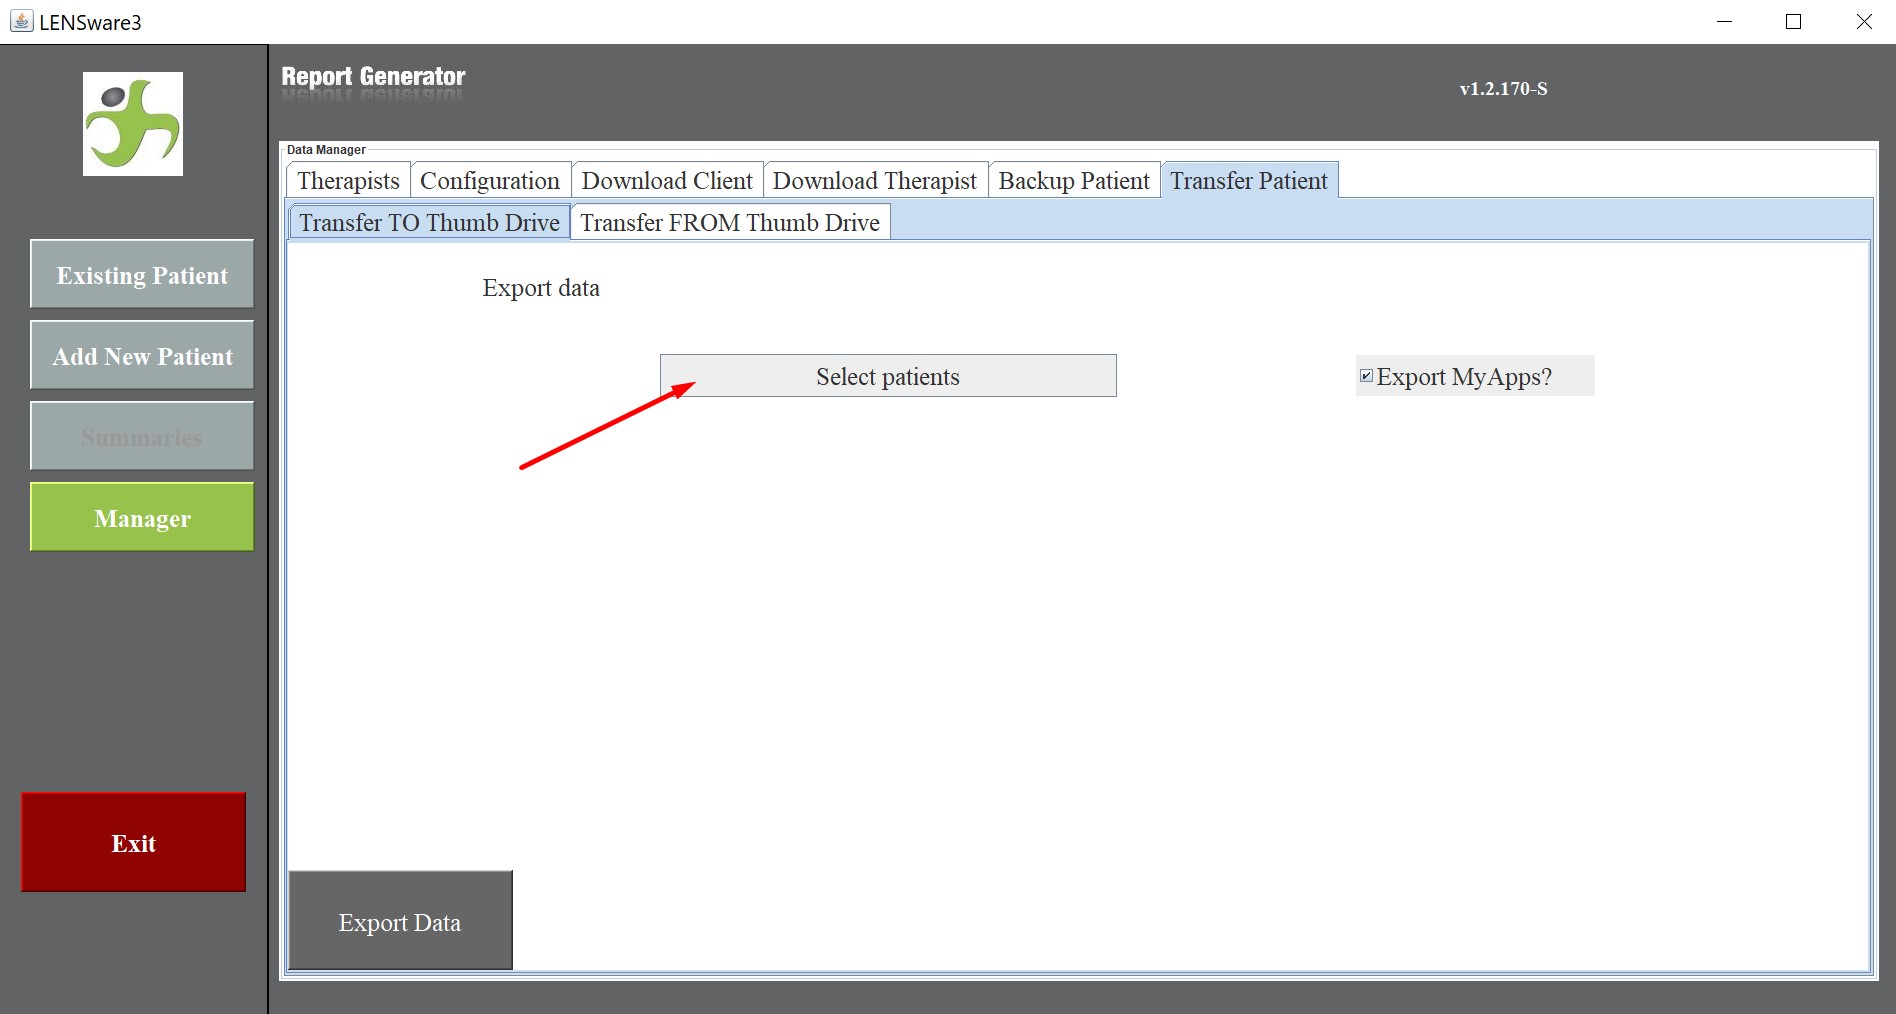
Please use CTRL + A to select all of your patient records.

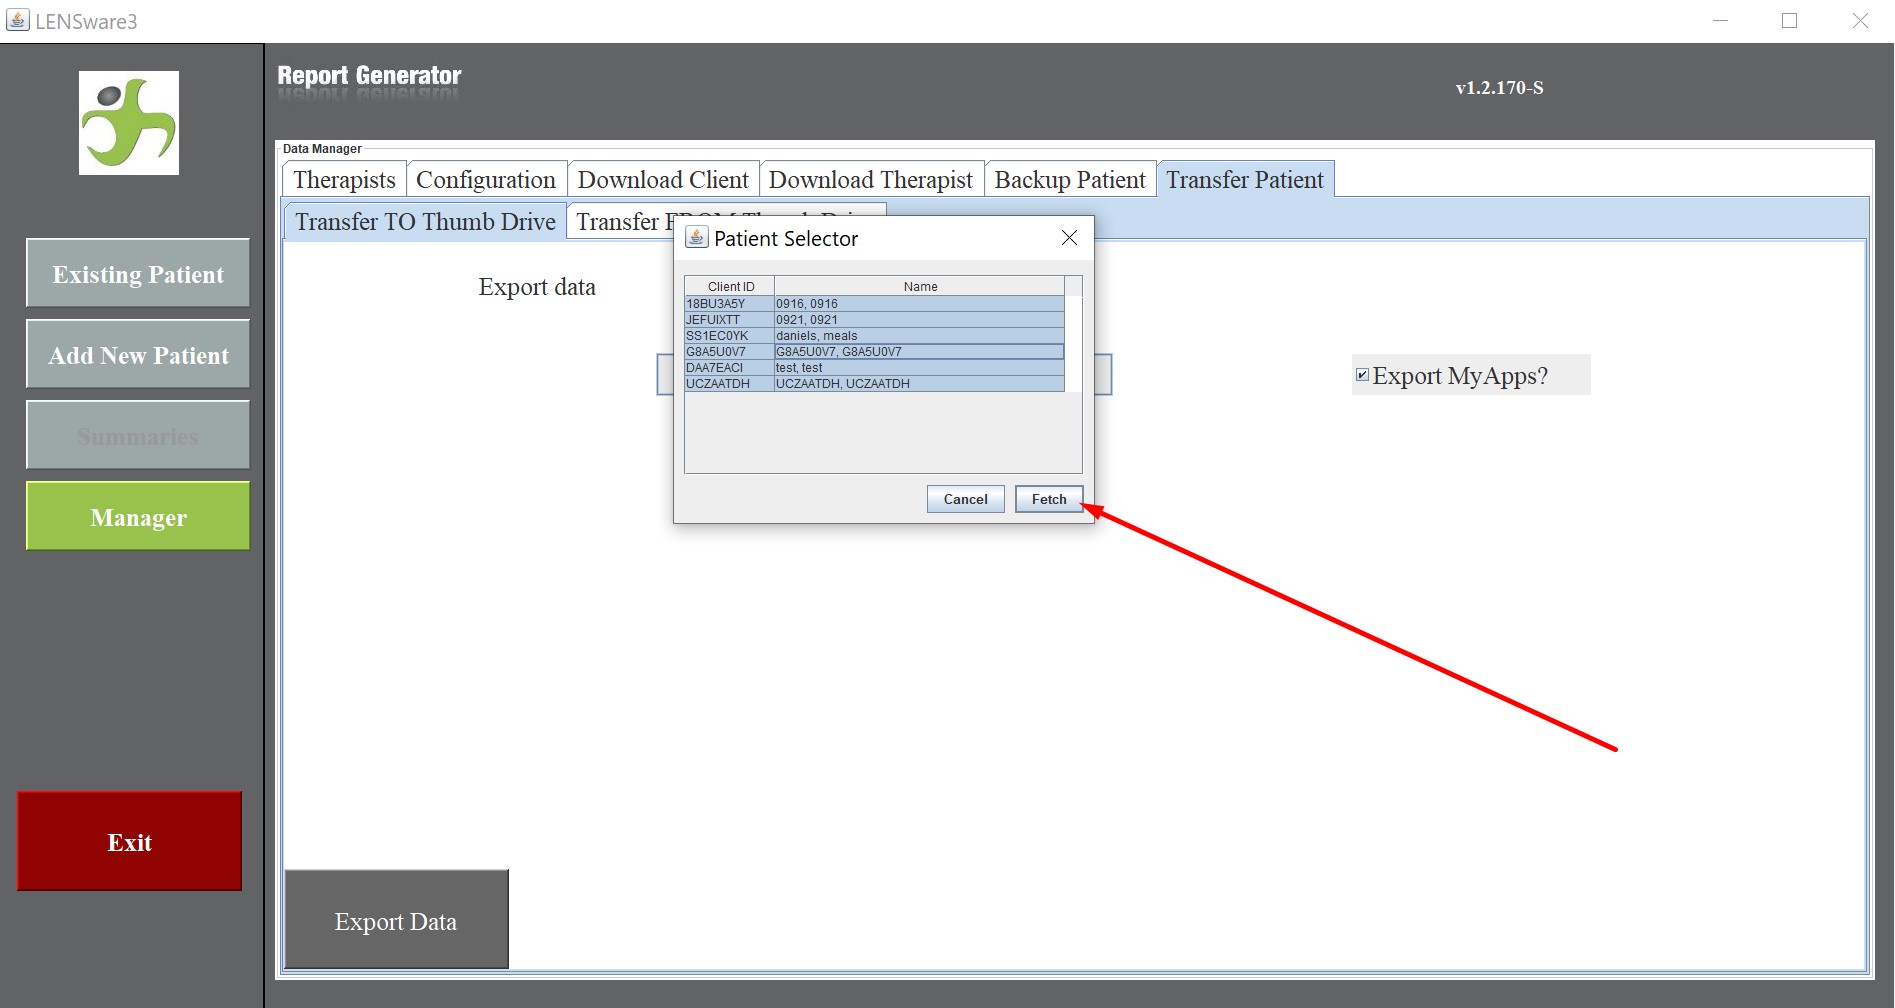
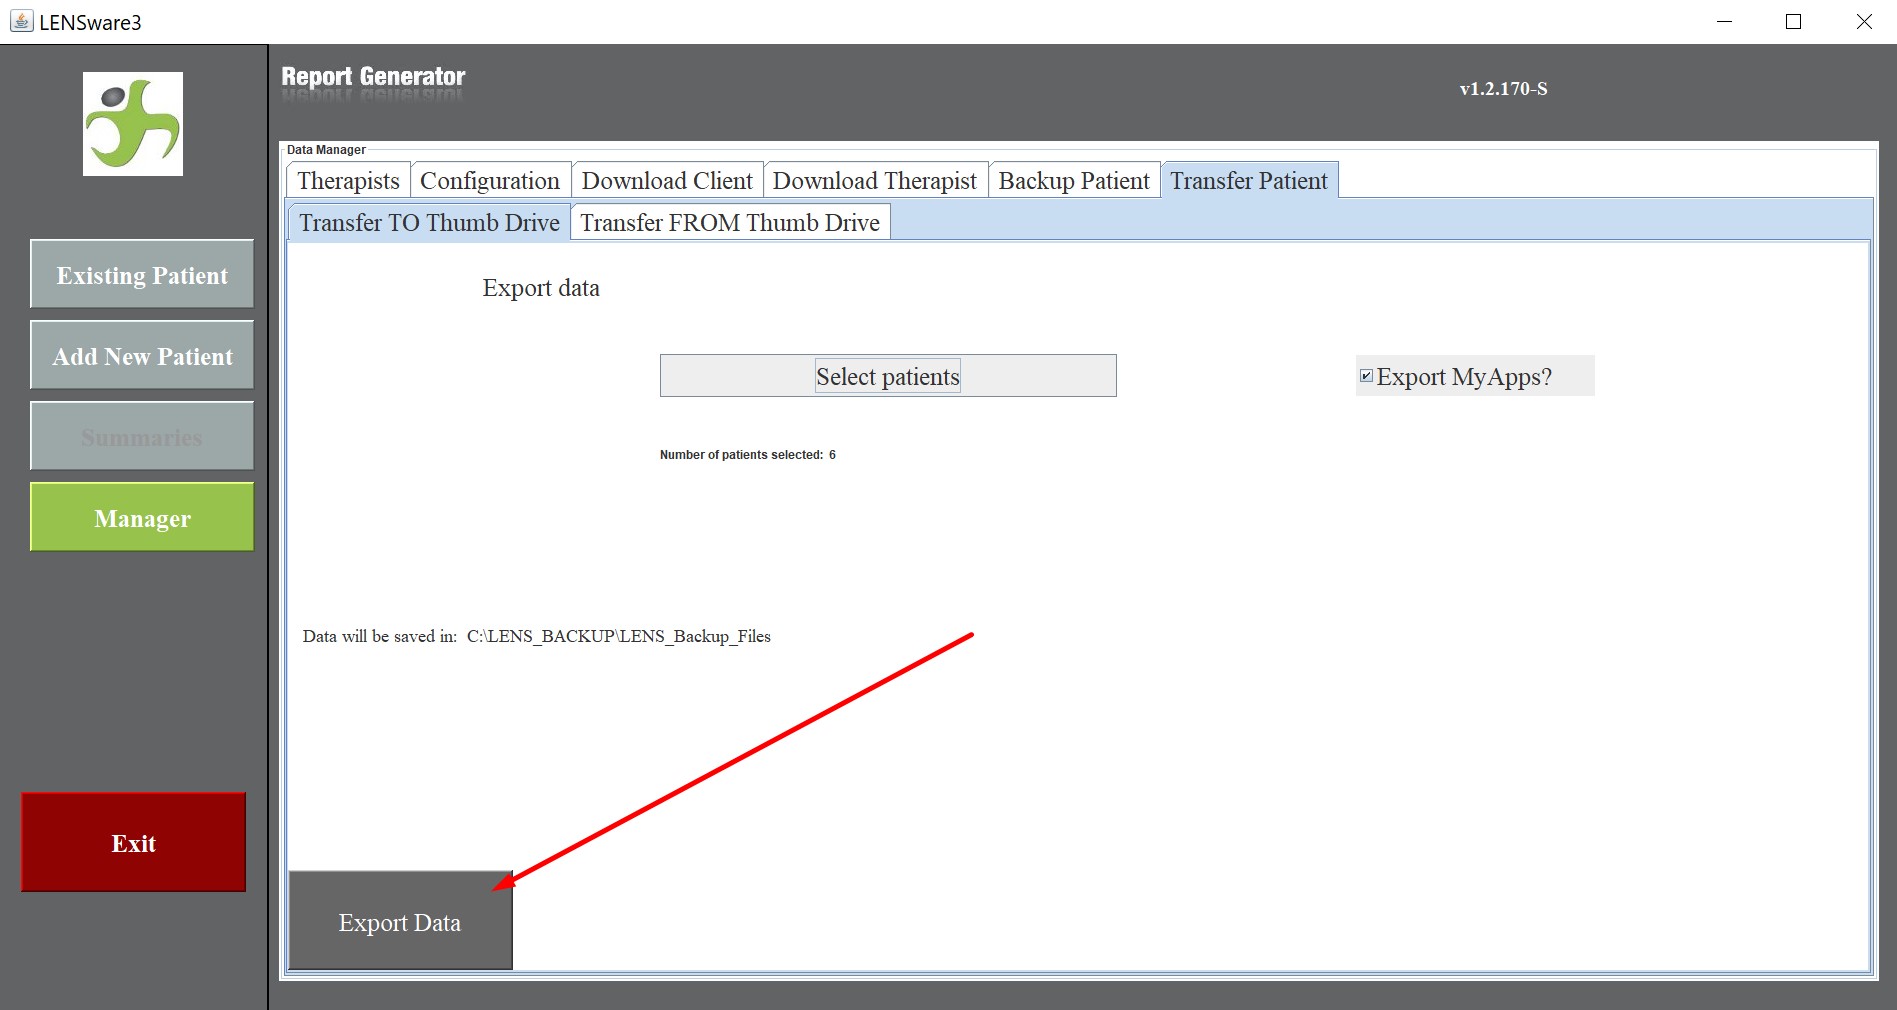
Once “Fetch” is selected, your export isn’t complete until you press the big “Export” button, and you see a success dialogue box like below:

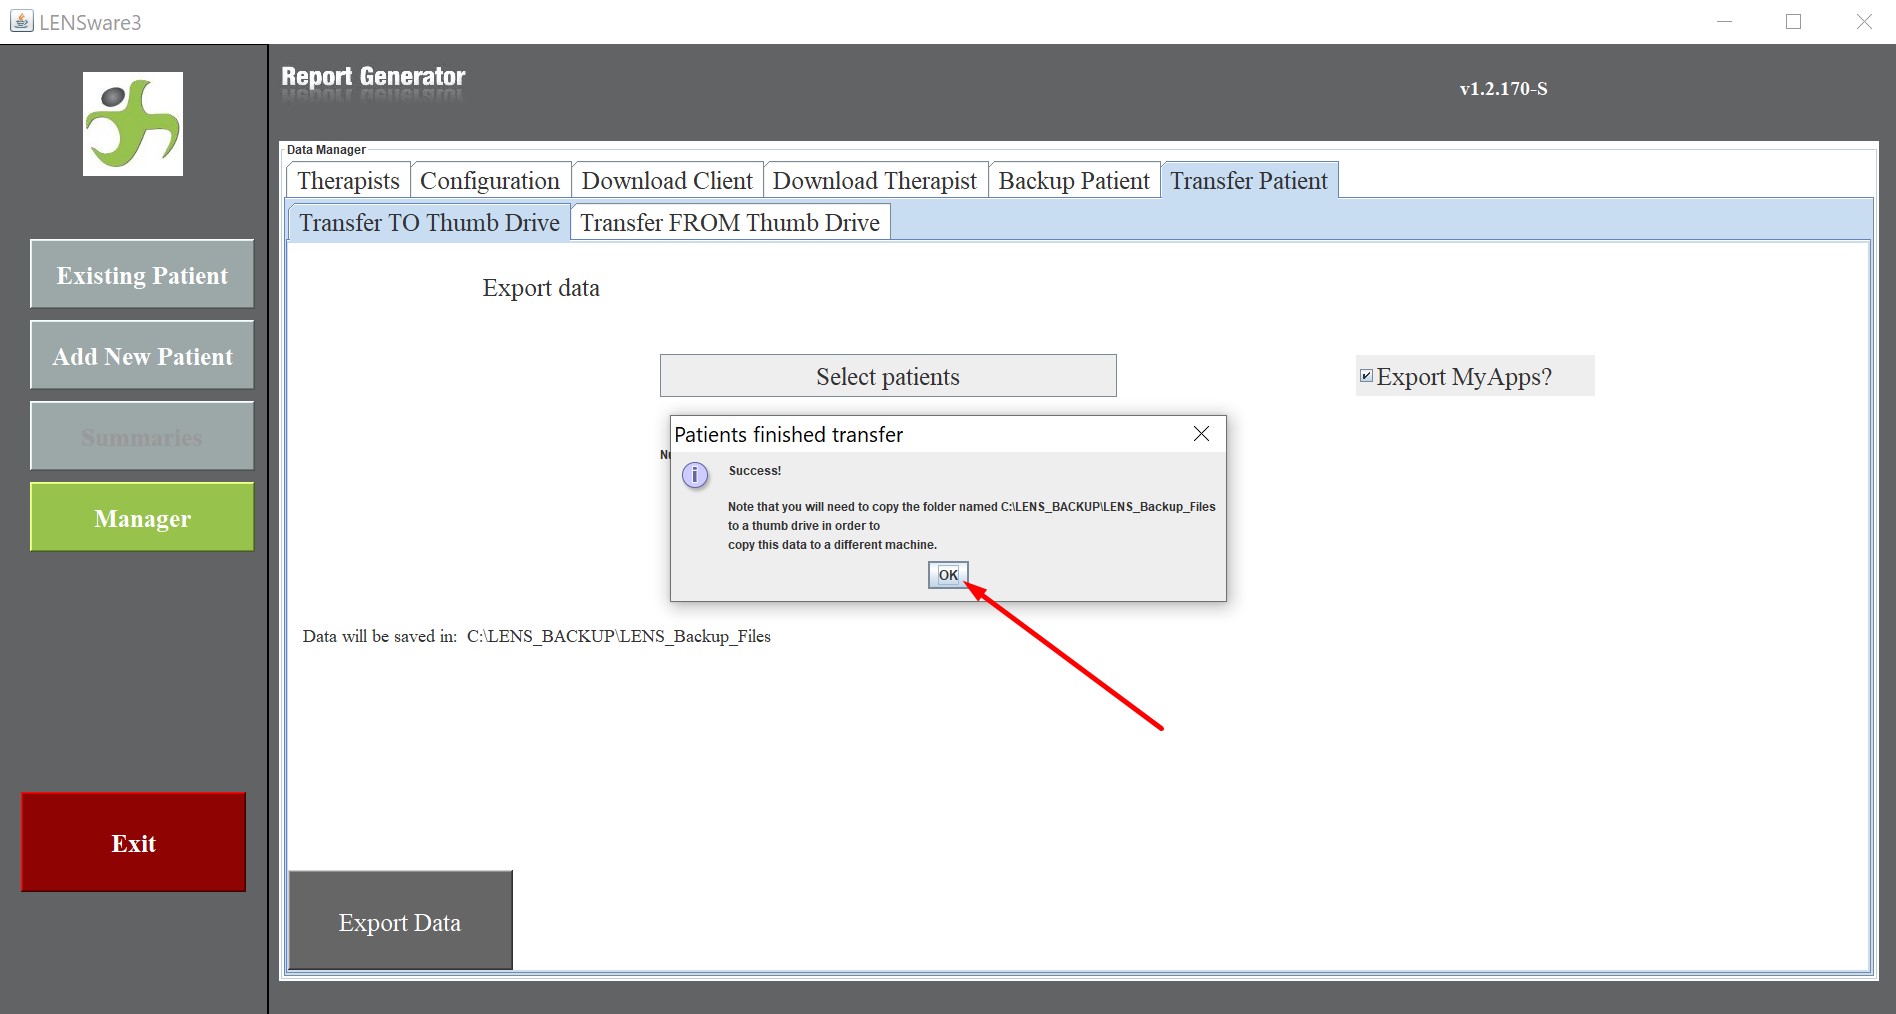
After this dialogue box shows, your back up process is complete! (Almost)

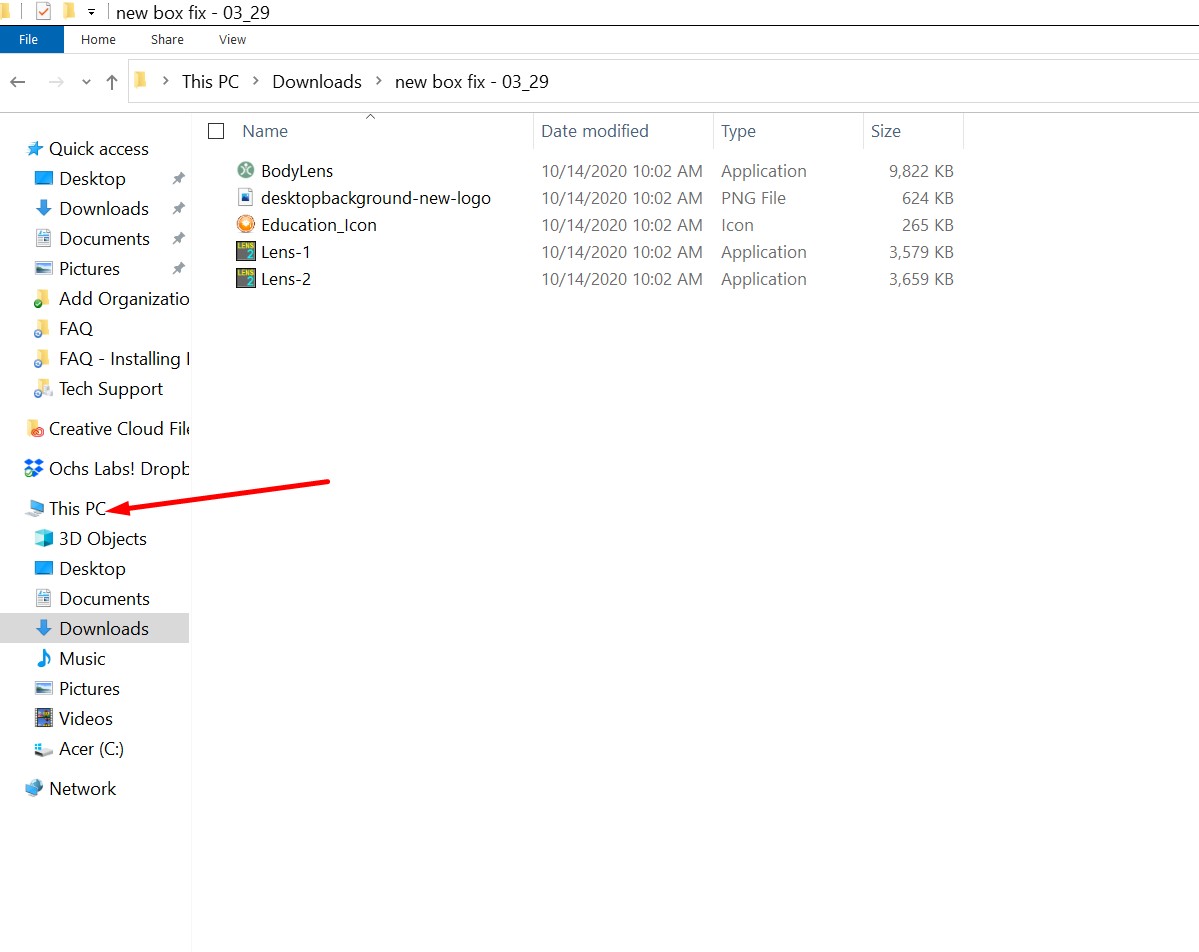
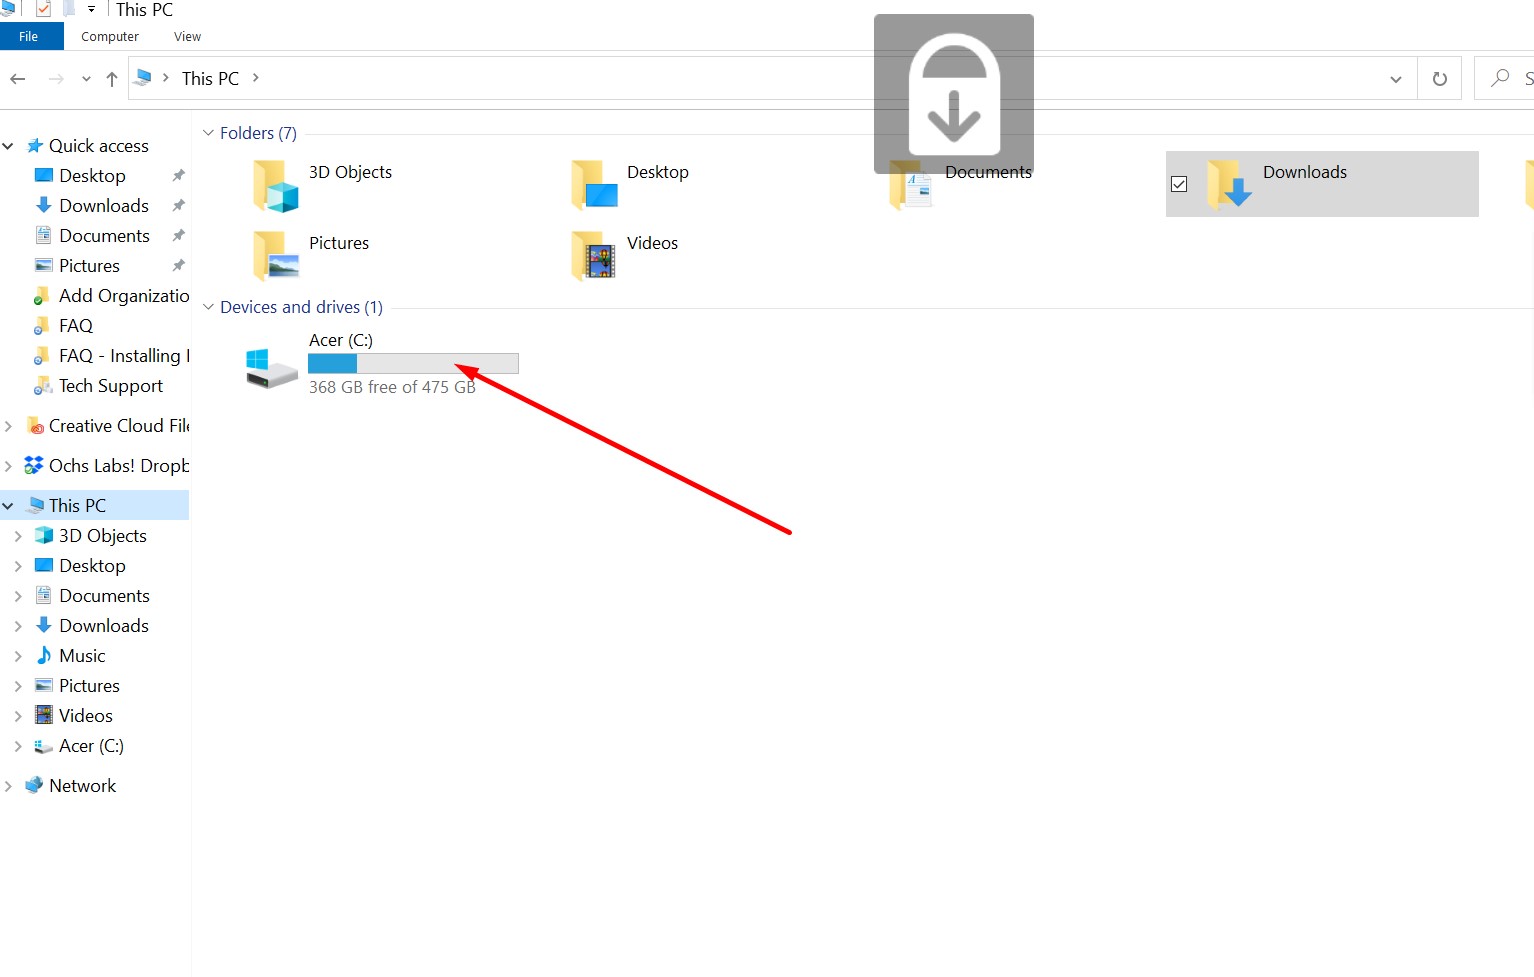
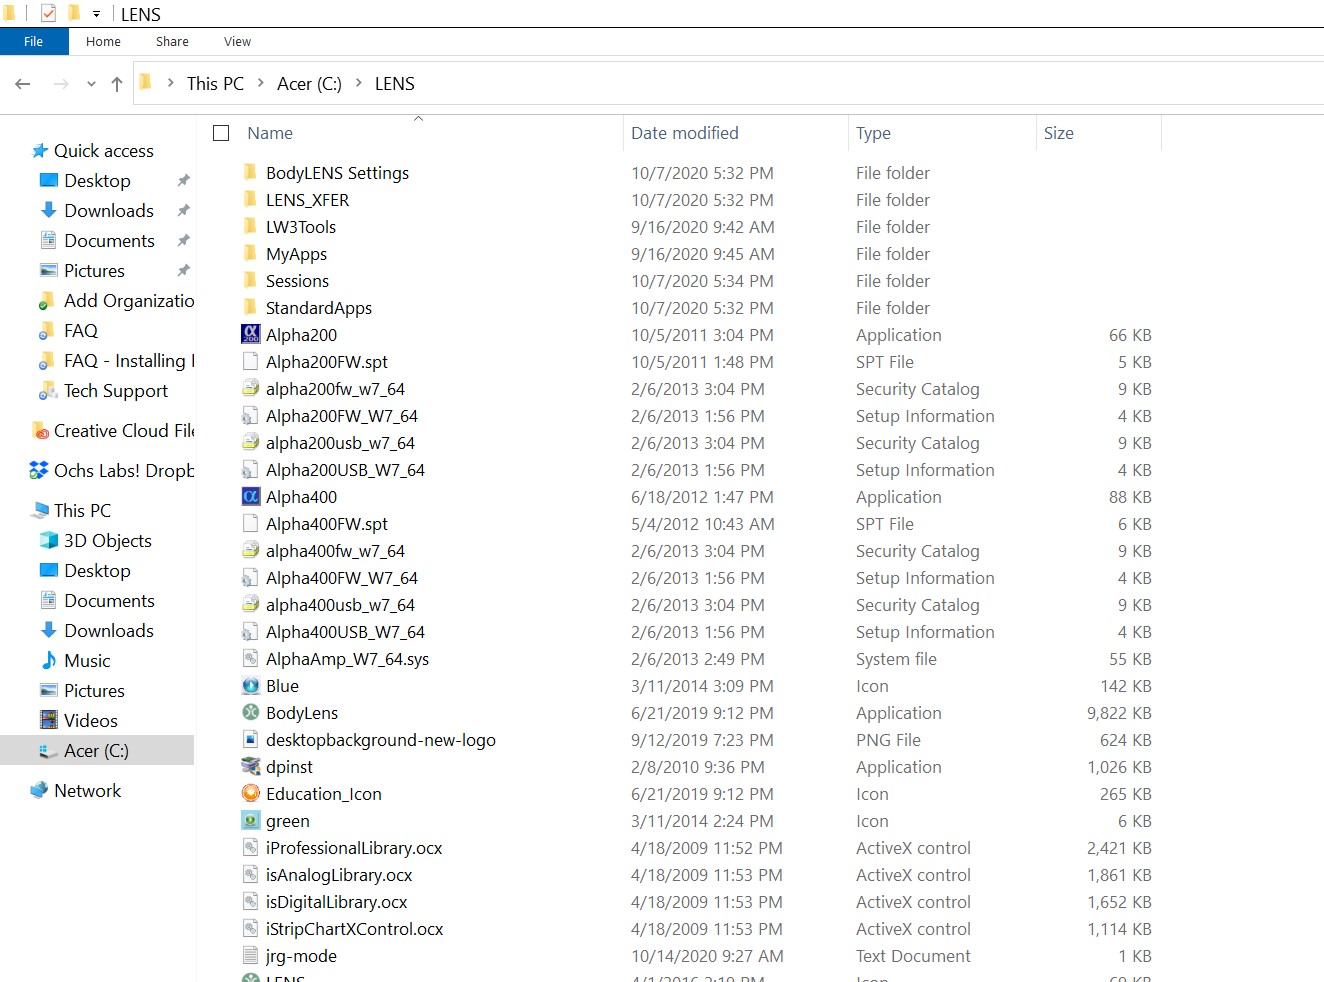
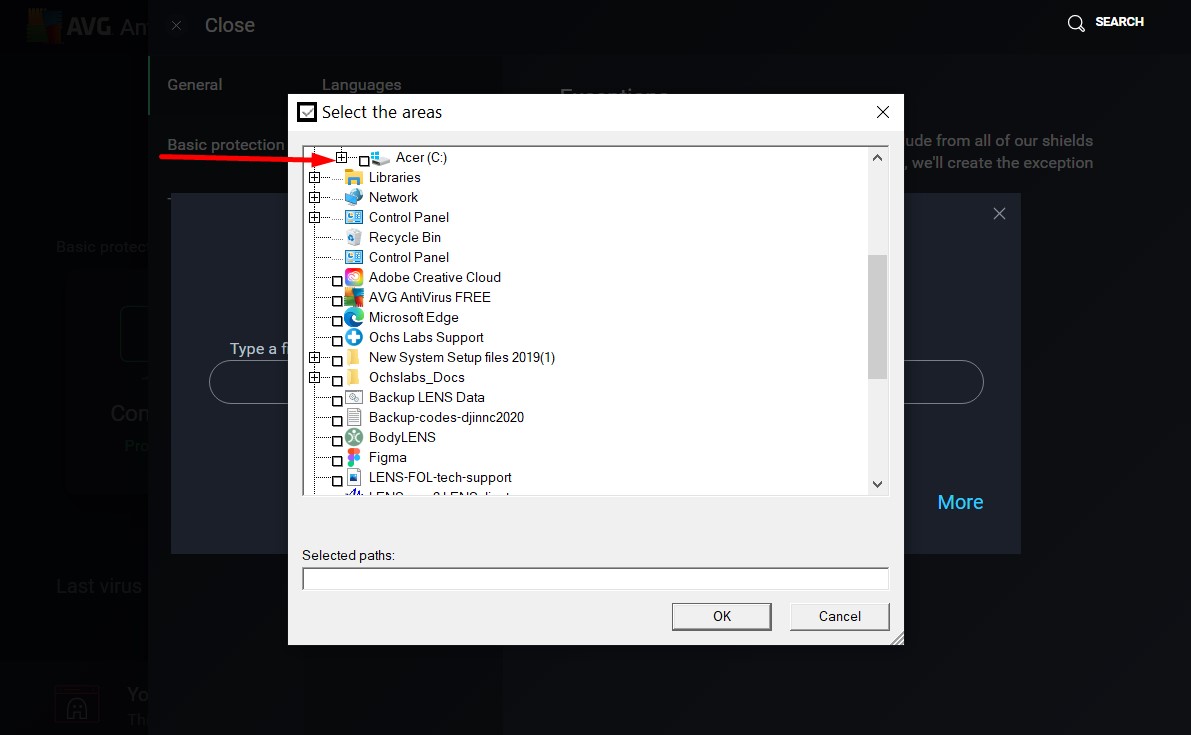
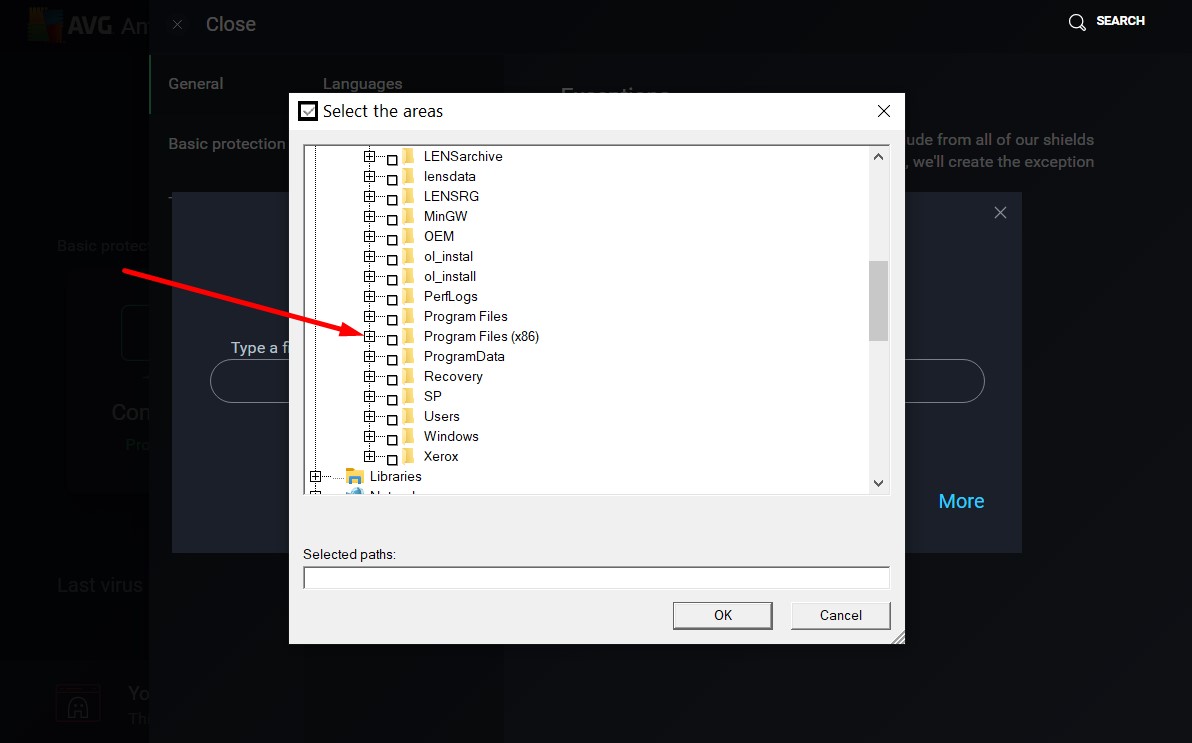
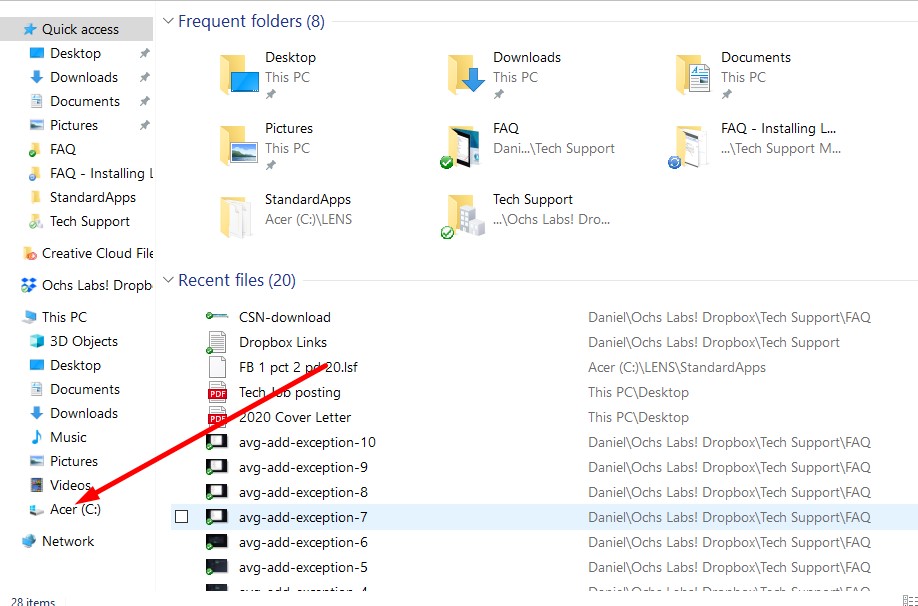
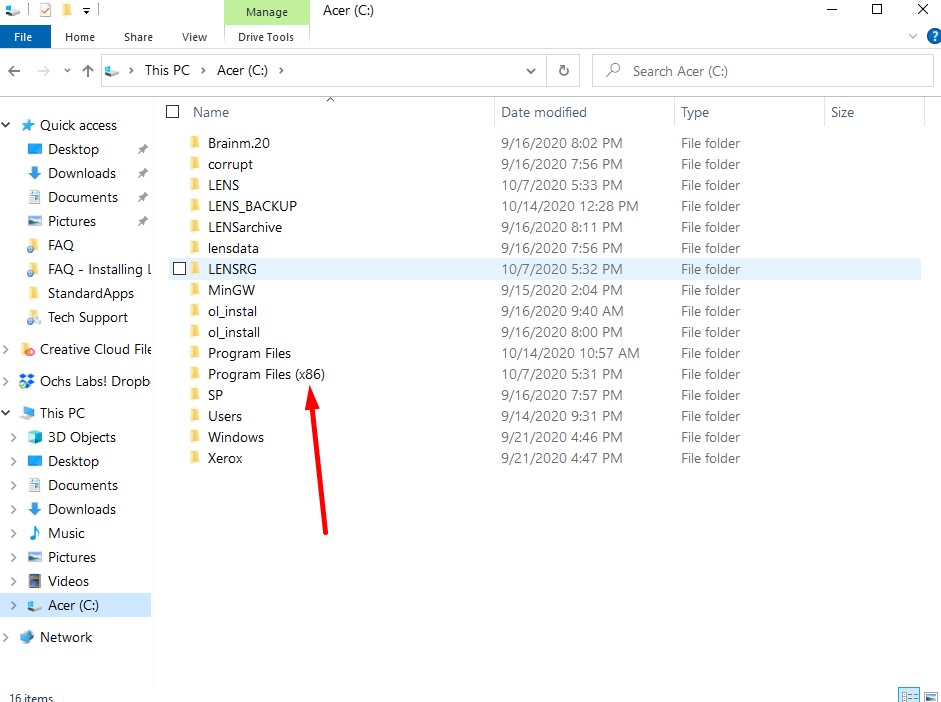
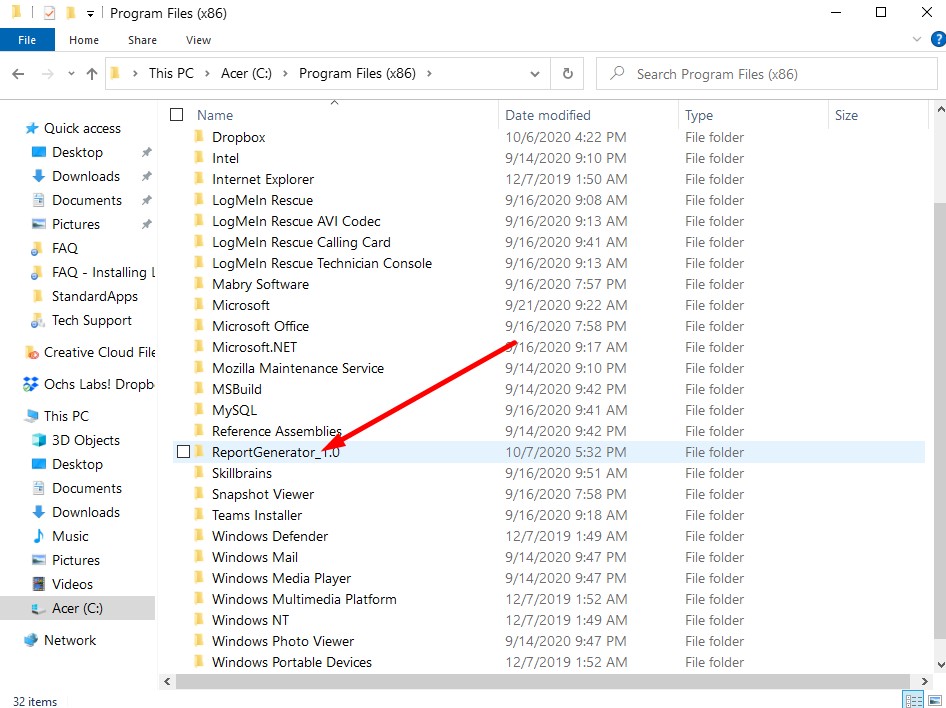
Note: It is highly recommended that you either use the Ochs Labs 4GB Thumb Drive that should have come with your LW3 Starter Kit, or another external memory device that you may have on hand. Your back up folder is located in your C:// drive. 

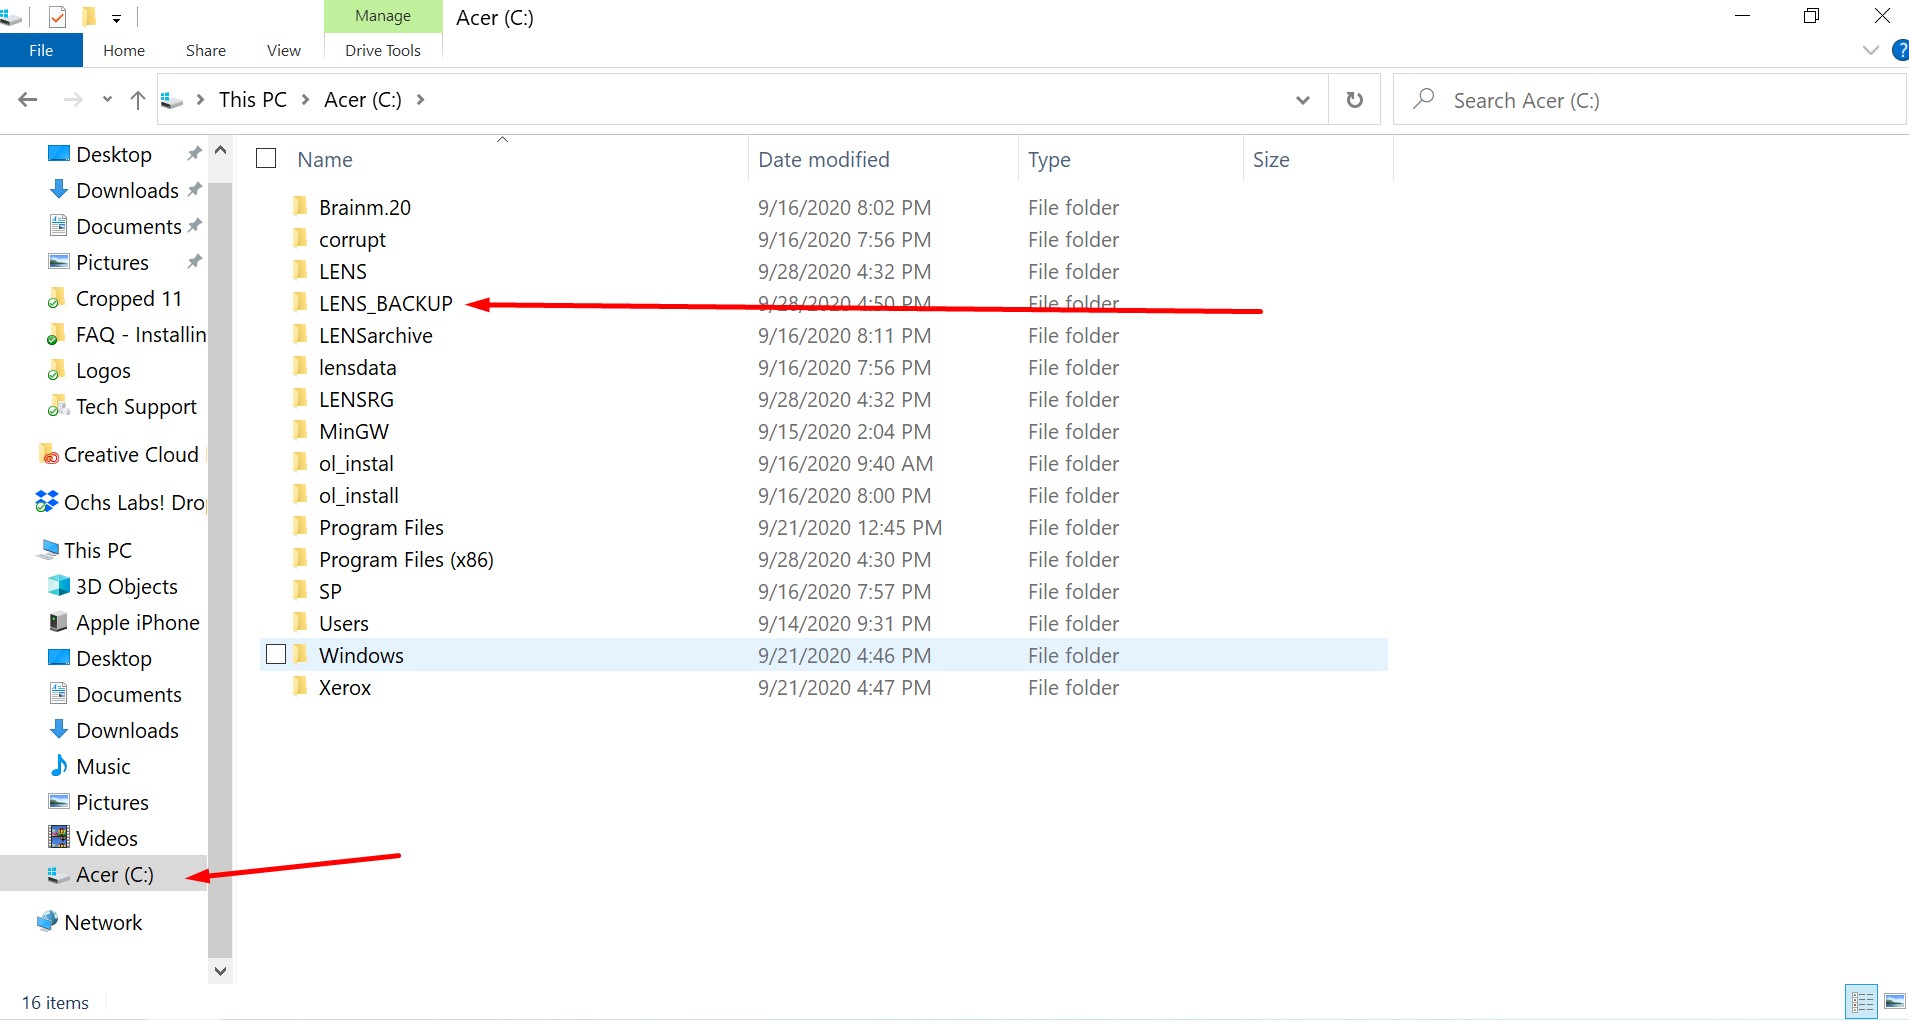
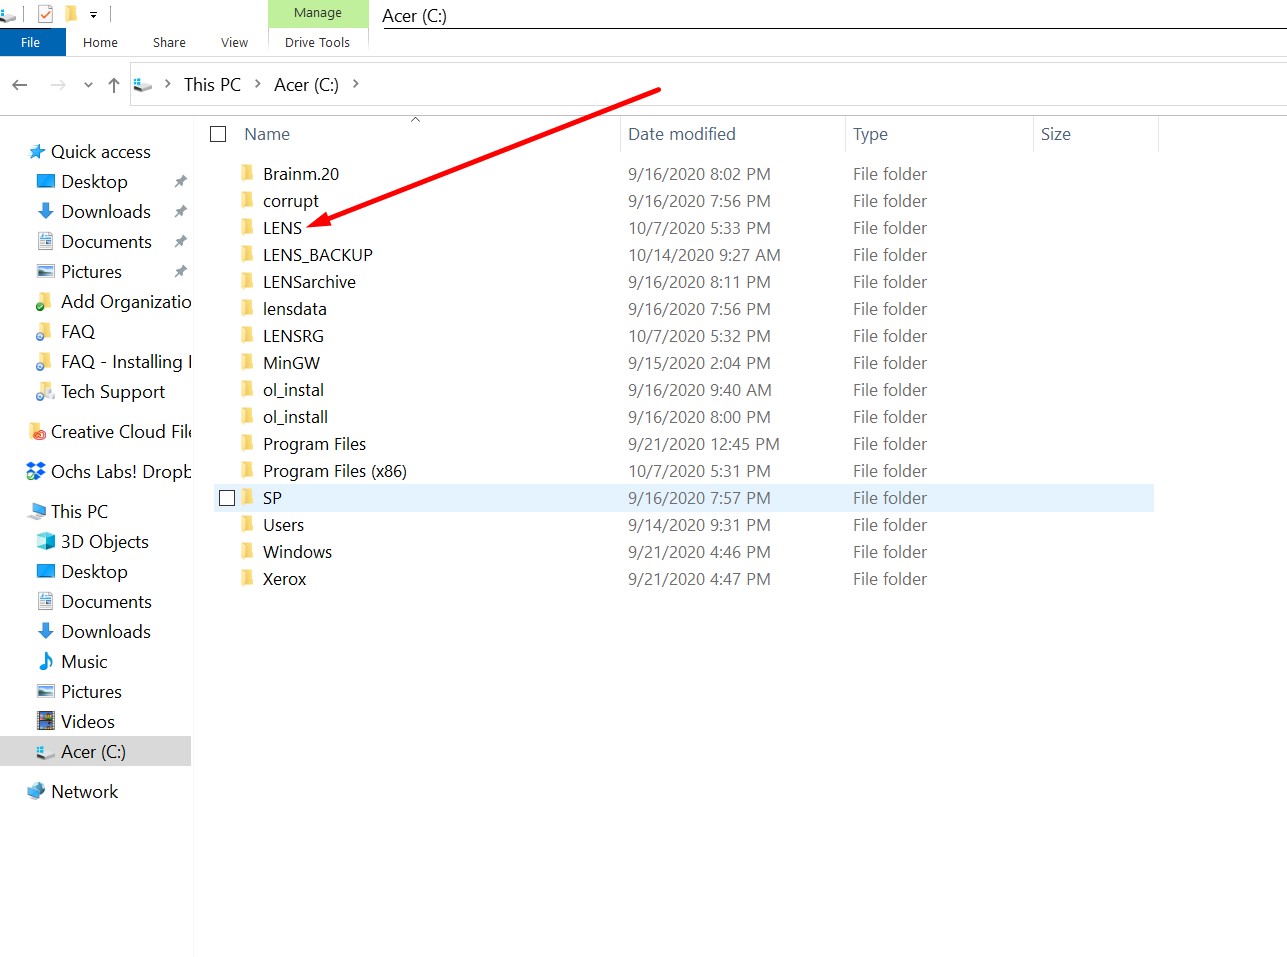
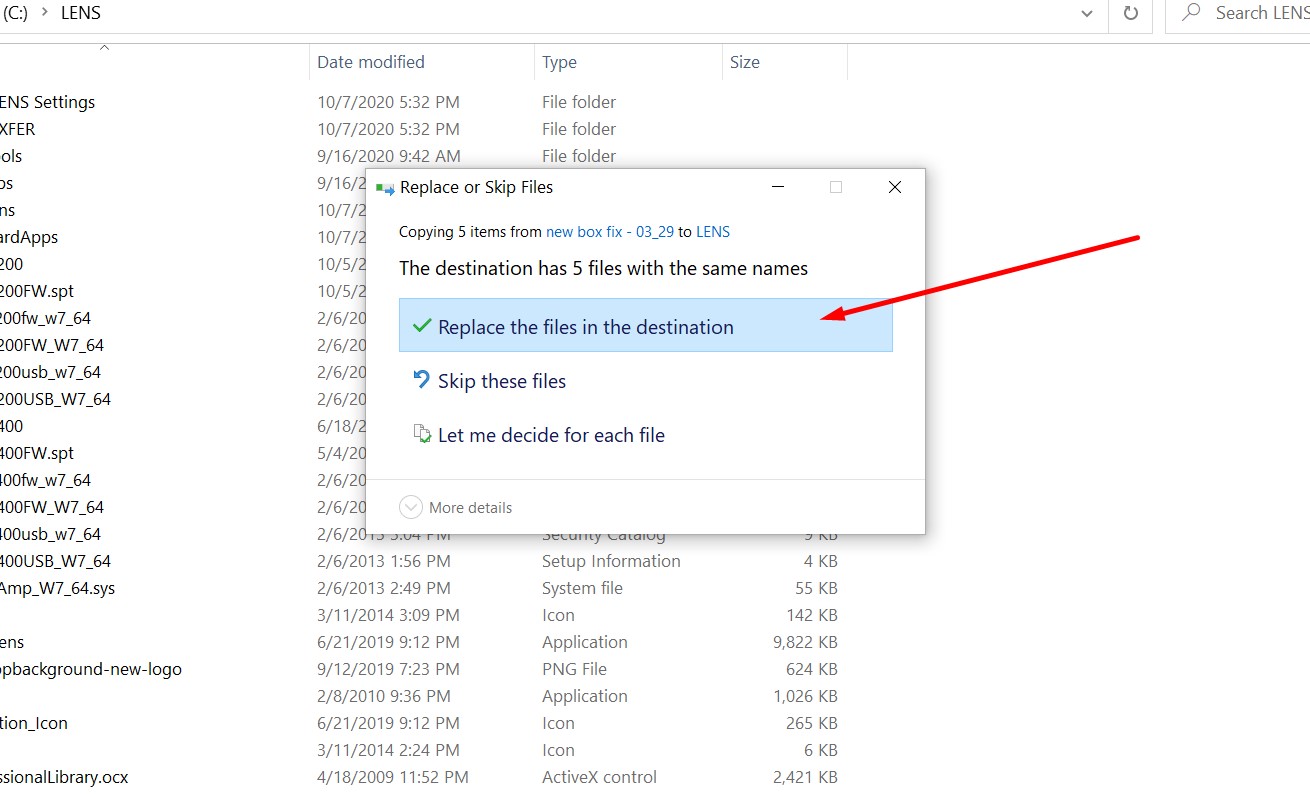
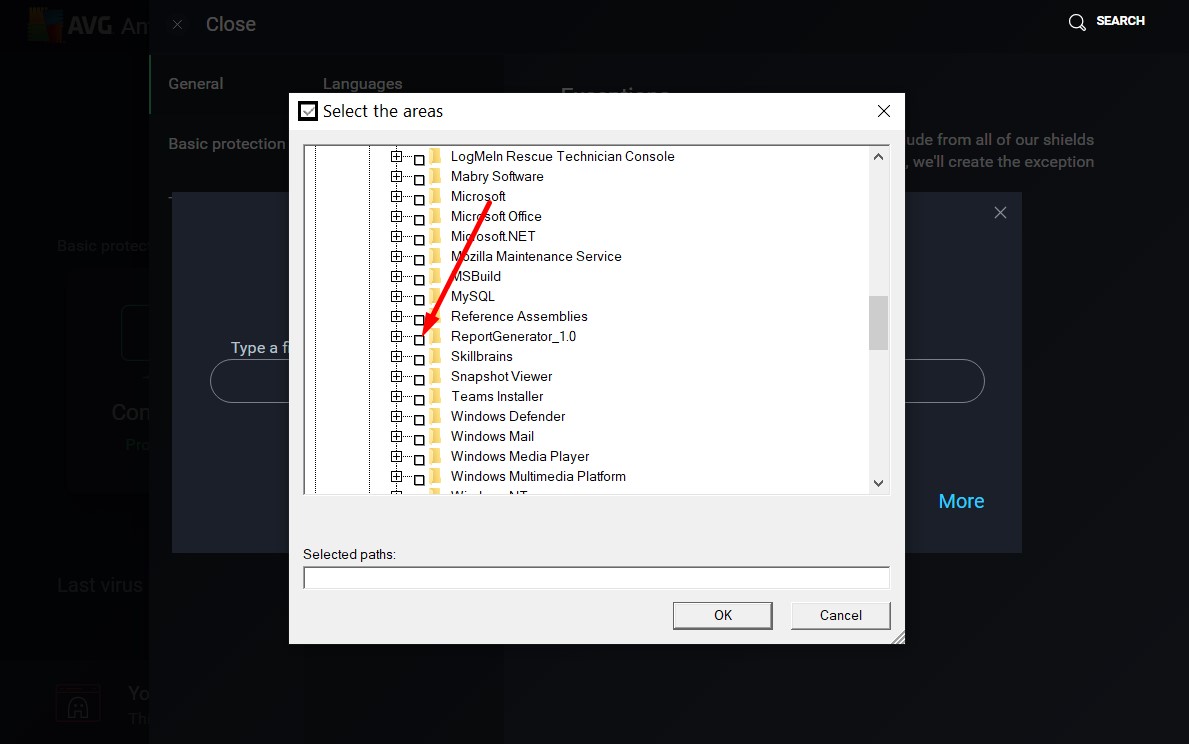
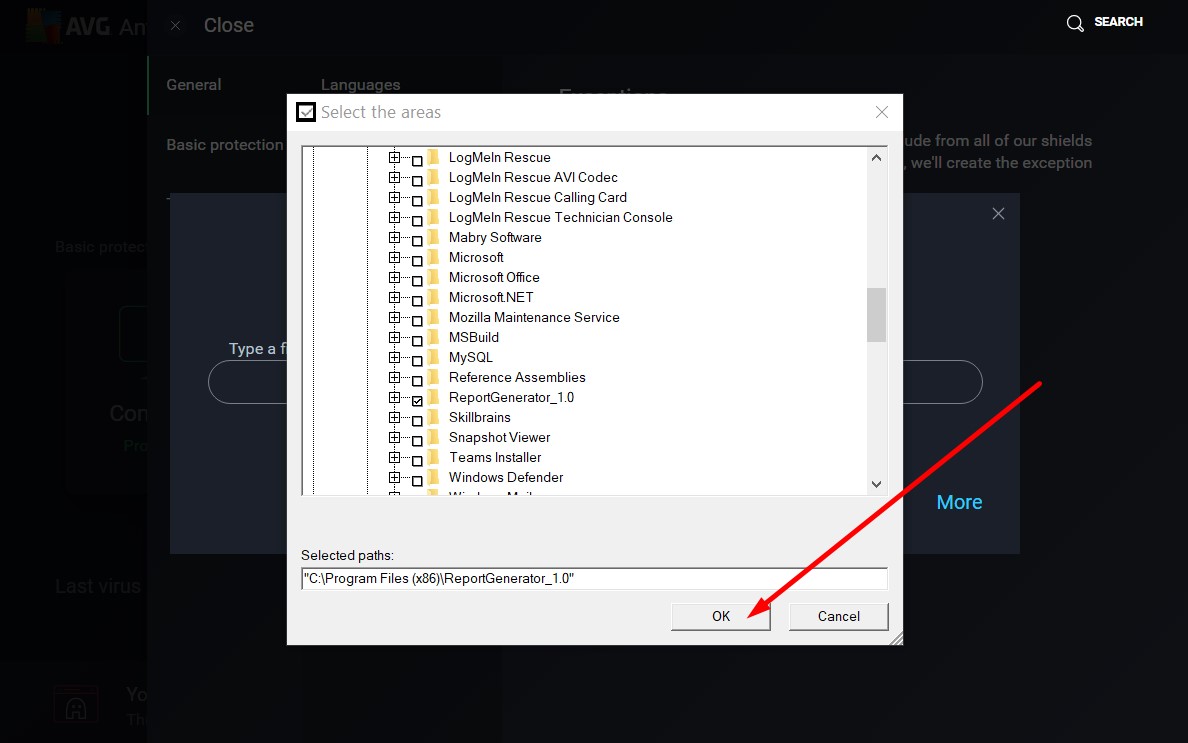
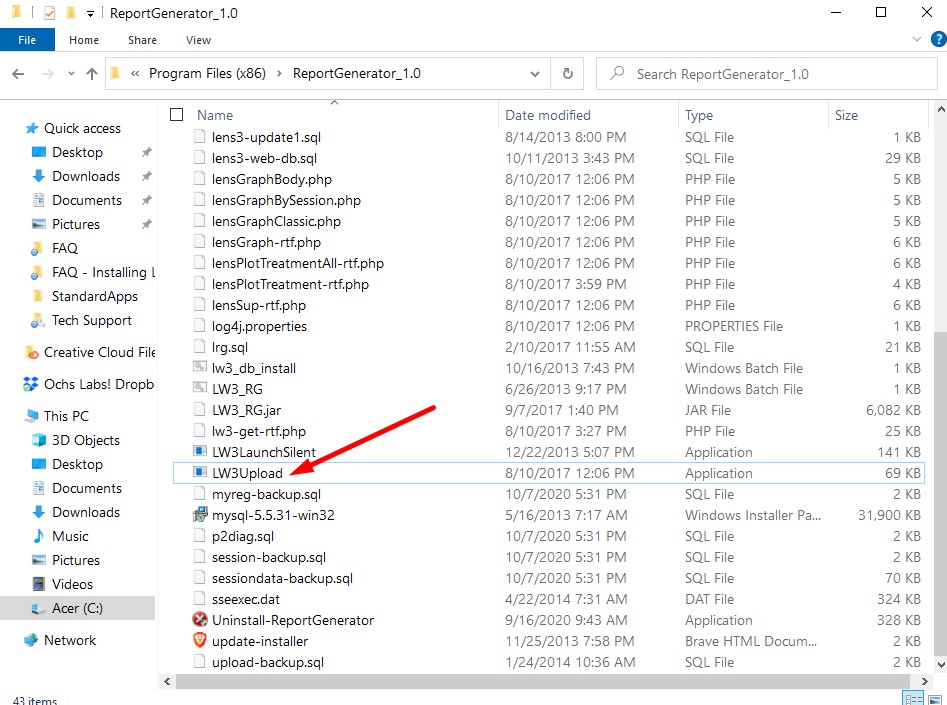
By right clicking on the back up folder and selecting the “copy”, you can then navigate to your external memory device and then right click and select the “paste” option to save your back up information. 

In order to be publicly listed on our “Provider Listing” section of our website, you will have to first add your organization as a business in your provider profile. To do so, first login to your provider portal using the login link at the upper right corner of any page on this website. 

Once logged in, select the “Business Information” header link, and then the “Add New Business Listing” link. 

Note: Please make sure to check the “Display on Ochs Labs Web Page” option enabled. Otherwise, this listing will not show! 

Once you have filled out the necessary information, make sure to click the “Save Changes” button and email our team letting us know you have added the listing and would like us to enable it from our administrative end. 

If you cannot seem to lower your impedance on an active channel please perform the following test. 

1) First test your amplifier without any sensors plugged in. Your output should look like the image below: 

2) The second test involves arranging your sensors so they are all “sandwiched” together, or “stacked like pancakes”. Please use the image below as a reference guide:

After you have stacked your sensors, activate the impedance test again and the impedance levels should look like they do in the image below. Anything 5k and below is a typical readout. 

If you are still seeing levels in the red range, then your impedance meter is definitely malfunctioning. Please contact an Ochs Labs representative to get the replacement process started. 

If you are seeing normal green levels, but still seeing red ranges when you have your sensors attached to a patient please check the following before calling in to start the replacement process:

1) Sensors are securely plugged in

2) You are using enough 10/20 Paste 

3) The patient is hydrated with at least 8 oz of water a few minutes prior to treatment

To get the replacement process started please call us at (707) 823-6225.

As always, please back up your patient data before working with any system files associated with LW3. You can find instructions to this process using the left panel on this page, and selecting the “Backing Up Patient Data” link.

If your session data is not recording, 9 times out of 10 it is going to be an amplifier driver issue. Please download the files you find after clicking the button below and then using the download option found in Dropbox’s upper right corner of the window:

Once done downloading, find the zip file (usually in you ‘downloads’ folder) and extract all of its contents by right clicking on the file, and selecting the “extract all” option. Follow the dialogue prompts without changing any options, and the extracted folder should populate in the same place you downloaded the original zip file.

Open the extracted folder, press CTRL + A to select all the files, and then CTRL + C to copy the files to your clip board.

Once you have done that, you must navigate to your LENS folder as illustrated below:

At the end of this sequence, you should be viewing a folder that looks like this:

Once you are at this step, press CTRL + V to paste your clipboard contents into this folder, and select the “replace files” option when prompted:

If your session data is still not recording after trying this guide, please call our office at (707) 823-6225 to schedule a technical support session.

If your treatment screen is not launching you will need to first back up your patient data and then make sure to copy that into an external memory device. 

After that is done, please uninstall Report Generator versions except version 1.0. If you have more than two versions installed, please start with the version number with the highest value and work your way down until you reach version 1.0:

Again, please do not uninstall version 1.0. Your system will prompt you to reboot your machine after an uninstall please do so.

Once you have rebooted your machine, please follow the directions found in the “Installing LW3” section of this FAQ. 

If that still doesn’t succeed in fixing your technical issue please call our office at (707) 823-6225 to schedule a technical support session.

Through our experience, we have determined that AVG’s Free version of Antivirus software plays very nicely with our LW3 software. If you have bought a new system from us on or after 10/14/2020 then this configuration should already be set up on your starter system.

If you have bought a new system prior to this date or simply want to add an antivirus layer to your system please download AVG Free using the button below:

Once done downloading and completing the installation process, you will have to add our files and folders as exceptions to the AVG system. (After a fresh install of AVG the software will prompt you to install Google Chrome and perform your first scan. It is up to you if you would like to do so).

Make sure you press the + icon and not just the checkbox to expand your C drive.

Make sure to check the checkbox this time.

Once you press ‘ok’, you should be all set!

Sometimes the Intake/CNS/Sensitivity Reports/Forms take absurdly long times to update/initially populate in your software. This is a known error and is currently being worked on by the Ochs Labs Development Team. 

In the meantime, there is a way to force your system to download these updates prior to launching your LW3 software.

Double click the LW3Upload application and a black command window should pop up.

Let the command window run until you start seeing CNS, Sensitivity, and Intake reports downloading.  Once it’s done running through it’s list of necessary updates, launch LW3 and all your reports should be populated/updated.